Upon submitting a form your users will be presented with a thank you message, or directing them to a new page. By default, this is a simple message letting them know that the form has been successfully submitted and thanking them for their submission. This is the perfect place to add a call to action link or a button to your products or services.
In this article, we will show you how to change your confirmation message (thank you page), as well as create custom confirmation messages based on the content that is submitted.
Adding and Editing Confirmation Messages
- Click on Campaigns and edit the campaign you want.
- Next click on the Form tab and then on Confirmations.
- From within this page, you should now see any available confirmations. If you want to edit an existing confirmation, you may simply click on its title. To add a new confirmation, click the Add New button.
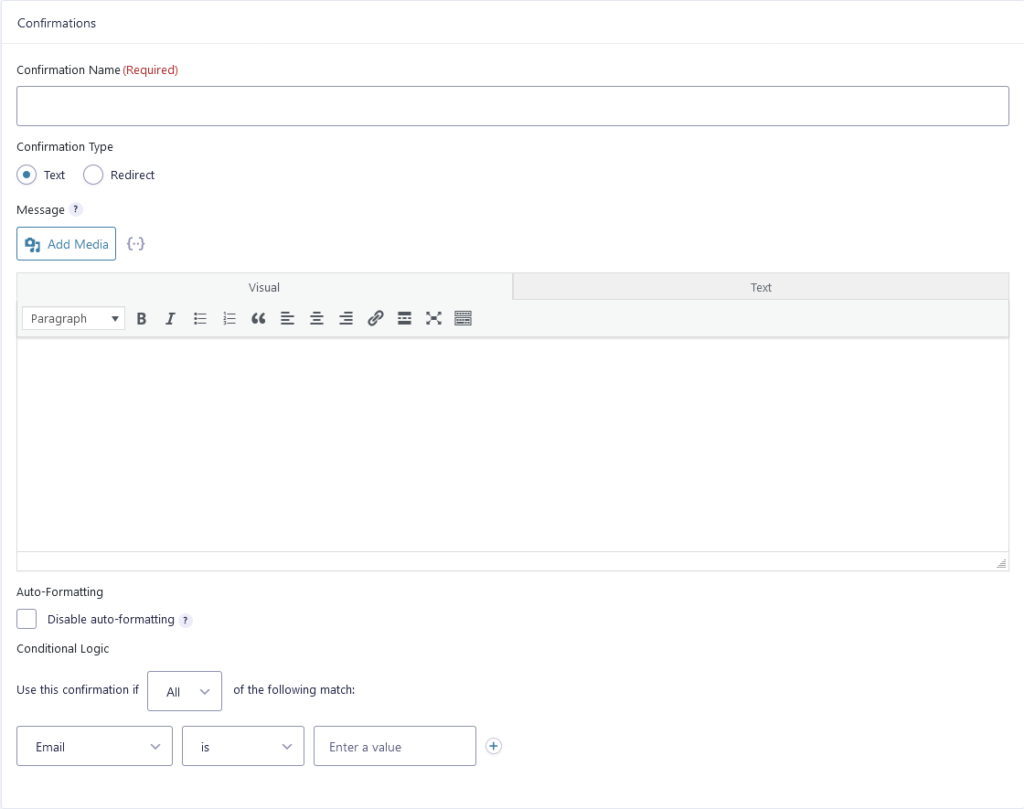
- The first field you will see is the confirmation name. This is simply a name to help you easier identify the confirmation. You may enter anything here.
- The next option is to set the Confirmation Type option. The 2 options are:
Text
Text confirmations simply allow you to display a bit of text to the user upon submission. If you need to simply thank the user for their submission or to add a call to action this is the perfect place for doing so.
Simply select the Text option, and begin writing your confirmation message in the below box. You can add Images, links, buttons or even a video as a confirmation message. If you want to disable auto formatting of the text, simply enable the checkbox labeled Disable Auto-formatting.
Redirect
If you want the user to be redirected to another location such as an external site upon submitting the form, you may set the Redirect confirmation type. To do so, simply select Redirect as the Confirmation Type, and enter the full URL that you want the user to be redirected to in the Redirect URL field.
Please note that using this feature on Facebook Tab the redirected URL will open inside the tab.
Conditional Logic in Confirmations
Sometimes you may want to send a user to a different thank you page or display different information to them based on what they submit within the form. Bellow we will show you how to use conditional logic within your form confirmation messages.
- Within your form confirmations page, you should notice a heading labeled Conditional Logic.
- The first field you will see is a dropdown in which you can switch between All and Any. Setting this to All will require all rules to match before the confirmation is sent. Conversely, setting it to Any will only require one of the rules to match.
- Below this, you will see another set of fields. The first in this set, will list your field name. In the second field, is the comparison operator.
For example, if you wanted to show a different confirmation for users that selected a particular radio button, you would select the field that contains the radio buttons, then is, and finally the individual radio button option that you want to base the confirmation on. In this scenario, users will receive the custom confirmation only if the particular radio button is selected. - If you want to add additional conditions, simply press, the + button to the right of your first condition
Merge Tags
Woorise uses merge tags to allow you to dynamically populate submitted field values and other dynamic information in confirmations messages and in notification emails.
For example you can dynamically display the Name of the user (if a Name field exist in your form) or any other information or choice the user made in the form.